Guide
How to Parawing Foil: A Step-by-Step Guide
If you already foil (prone, SUP, wing, or kite) and you’re picking up a parawing for the first time, this guide covers every step from unpacking on the beach to riding upwind on foil. The assumption is that you’re comfortable on a hydrofoil and understand basic foil control, board trim, and water safety. What’s new is the parawing itself: how to set it up, launch it, fly it from a harness, and manage it on the water.
Parawingfoiling adds a new power source to a skill set you already have. The learning curve is short if you approach it methodically.
Before You Go: Gear Check
Before heading to the beach, make sure your setup is complete and in good condition.
Parawing and bar: Unpack at home first if this is a new wing. Familiarise yourself with the line layout, the bar orientation, and how the wing connects to the bar. Most parawings use colour-coded lines (red on the left, blue/green on the right when facing the wing). Check that no lines are tangled or frayed.
Harness and spreader bar: A standard kite spreader bar harness works for parawingfoiling. Make sure the hook is clean and the spreader bar slides freely. If you’re coming from wingfoiling with a waist harness that doesn’t have a hook, you’ll need to switch or add a spreader bar setup. See our harness and spreader bar guide for how to choose one and set it up.
Foil board and hydrofoil: Use whatever board and foil you’re already comfortable on. A mid-length (around 5’ to 6’) prone or SUP foil board works well. Shorter boards are fine if you’re confident with your water starts. Make sure the foil is assembled, bolts are tight, and the mast is secure.
Conditions: For your first sessions, aim for steady wind between 12 and 18 knots with minimal gusts. Flat water or small chop is ideal. Avoid offshore wind, strong currents, or crowded spots while you’re learning the launch and stow process.
Step 1: Beach Setup
Laying out the wing
Find a clear area of beach with the wind at your back. Lay the parawing out downwind of you with the leading edge (the front of the canopy) facing into the wind and the trailing edge closest to you.
Spread the canopy flat and walk along the trailing edge to check that no lines are crossed or wrapped around each other. This is the single most important pre-flight check. Crossed lines will prevent the wing from inflating properly and can cause it to spin on launch.
Connecting the bar
If your bar isn’t already connected, clip or loop the lines onto the wing’s bridle attachment points. Follow the manufacturer’s instructions for your specific wing. Most systems use a larks-head knot or a small carabiner.
Run your fingers along each line from the bar to the wing to confirm there are no tangles, knots, or twists. With a parawing’s short line lengths, this takes seconds.
Connecting to the harness
Clip the bar’s chicken loop or connection line onto your spreader bar hook. Give it a firm tug to confirm it’s seated properly. Make sure your safety release (if your bar has one) is accessible and you know how to activate it.
Step 2: Launching the Parawing
Ground launch technique
Stand with your back to the wind and the wing laid out in front of you. Hold the bar with both hands at roughly chest height. The wing should be flat on the ground with the leading edge facing away from you.
To launch, take a few steps backward. The wind will catch under the leading edge and begin to inflate the canopy. As the wing lifts, keep gentle tension on the bar by holding it steady. The wing will rise overhead in an arc.
Once the wing is overhead and stable, you’ll feel a forward pull through the harness. This is the power that will drive you on the water. Let the harness take the load rather than your arms. Your hands are on the bar for steering input, not for supporting the wing’s pull.
Common launch mistakes
Pulling too hard on the bar during launch. This collapses the trailing edge and stalls the wing before it’s fully inflated. Keep the bar neutral and let the wind do the work.
Launching in turbulent wind. If the wind is gusty or swirling near the shore (common with onshore wind hitting dunes or buildings), walk further down the beach to find cleaner airflow. A smooth launch sets up the whole session.
Not checking lines before launch. A single crossed line will cause the wing to spiral. Always walk the lines before every launch.
Launching with help
If you’re new to parawings, having someone hold the wing’s leading edge while you step back and tension the lines makes the first few launches much easier. Once the wing starts to inflate, your helper releases it and the wind takes over.
Step 3: Walking to the Water
With the wing flying overhead, walk toward the water with the board under your arm (or already floating at the water’s edge if you set it up beforehand). The wing will fly itself with minimal input once it’s stable overhead.
Keep light hands on the bar. Small steering corrections are all you need to keep the wing centred above you. If the wing drifts to one side, a gentle pull on the opposite side of the bar brings it back.
Tip: If you’re carrying your board, tuck it under your downwind arm so it doesn’t catch the wind. Some riders prefer to leave the board at the water’s edge and launch the wing after wading in.
Step 4: Water Start and Getting on Foil
Body position
Wade into waist-deep water with the wing overhead. Get onto your board in your normal foiling stance (prone or standing, depending on your board). The wing should be providing a steady forward pull through the harness.
If you’re used to prone foiling, start prone and let the wing pull you forward. Once you have enough speed, pop up to your feet as you normally would. If you ride a larger board that allows standing starts, stand on the board and let the wing build speed gradually.
Building speed
The parawing generates a constant forward pull, unlike a handheld wing where you actively pump and steer for power. Let the harness take the load and focus on your board trim and body position.
As speed builds, you’ll feel the foil start to generate lift. This is the same sensation you know from other foiling disciplines. Shift your weight slightly back to let the foil rise, then level out once you’re up on foil.
First rides
For your first few rides, focus on straight-line foiling. Don’t worry about going upwind yet. Just get comfortable with the sensation of foiling while a parawing flies overhead. The wing’s pull feels different from a handheld wing or a kite because it’s constant and attached to your body rather than your hands.
Your hands are free. This is the biggest adjustment. Use them for balance, grip the board’s rail if needed, or simply let them hang. The instinct to reach for something takes a few sessions to fade.
Step 5: Riding Upwind
Once you’re comfortable foiling in a straight line, the next step is riding upwind. This is where parawingfoiling becomes genuinely practical: the ability to ride upwind efficiently is what makes loops and distance sessions possible.
Steering the wing
To go upwind, you need the wing slightly off to one side, pulling you at an angle rather than straight downwind. Use the bar to steer the wing toward the upwind side. A gentle pull on the upwind side of the bar redirects the wing, and the pull angle changes.
The amount of upwind angle you can achieve depends on your wing, your foil’s efficiency, and the wind strength. Most riders find they can hold a reasonable upwind angle within a few sessions.
Body positioning for upwind
Lean your weight slightly upwind and keep the foil engaged. The harness transfers the wing’s pull to your hips, so your legs and core are doing the balance work. The sensation is similar to riding upwind on a kite foil but with less power and a smoother, more constant pull.
Turning and jibing
Turning with a parawing is simpler than with a handheld wing because you don’t need to flip or switch the wing during a jibe. Initiate your turn on the board as you normally would, and use the bar to redirect the wing to the new heading. The wing follows your bar input smoothly.
Practice wide, gentle turns first. Tight turns at speed with a parawing overhead take more coordination and come with time.
Step 6: Stowing the Parawing on Water
One of the defining features of parawingfoiling is the ability to stow the wing mid-session and continue foiling, paddling, or surfing without it. Mastering the stow is essential for downwind runs, wave riding, and keeping the wing out of the way when you don’t need power.
How to stow
- Reduce tension. Slow down on the foil or come off foil entirely so the wing has less load on it.
- Pull the bar toward your body. This collapses the wing by shortening the lines and bringing the trailing edge forward.
- Bundle the wing against the bar. As the canopy collapses, gather the fabric loosely around the bar. Most riders wrap it into a compact bundle and tuck it against their harness or hold it under one arm.
- Secure it. Some riders use a velcro strap or simply hold the bundle. The wing and bar together weigh under 500g, so it’s barely noticeable.
The entire stow process takes about 10 to 15 seconds once you’ve practised it a few times.
When to stow
Downwind runs: Deploy the wing upwind, ride to your turnaround point, stow, and prone foil or paddle back. Or deploy, ride the whole downwind leg, and stow at the end.
Wave sessions: Deploy to get out to the lineup, stow, surf the waves on the foil, then redeploy when you need power to get back upwind.
Resting: Stow the wing if you want to sit on your board and take a break without the wing pulling you.
Step 7: Relaunching from the Water
Relaunch technique
- Unwrap the wing from the bar. Shake the bundle loose so the canopy can catch the wind.
- Hold the bar in front of you with the wing trailing downwind in the water or just above the surface.
- Let the wind catch the leading edge. As air flows under the canopy, it will start to inflate and lift.
- Feed out the lines gradually. Don’t let the wing shoot straight overhead with full power. Keep tension moderate and let it rise smoothly.
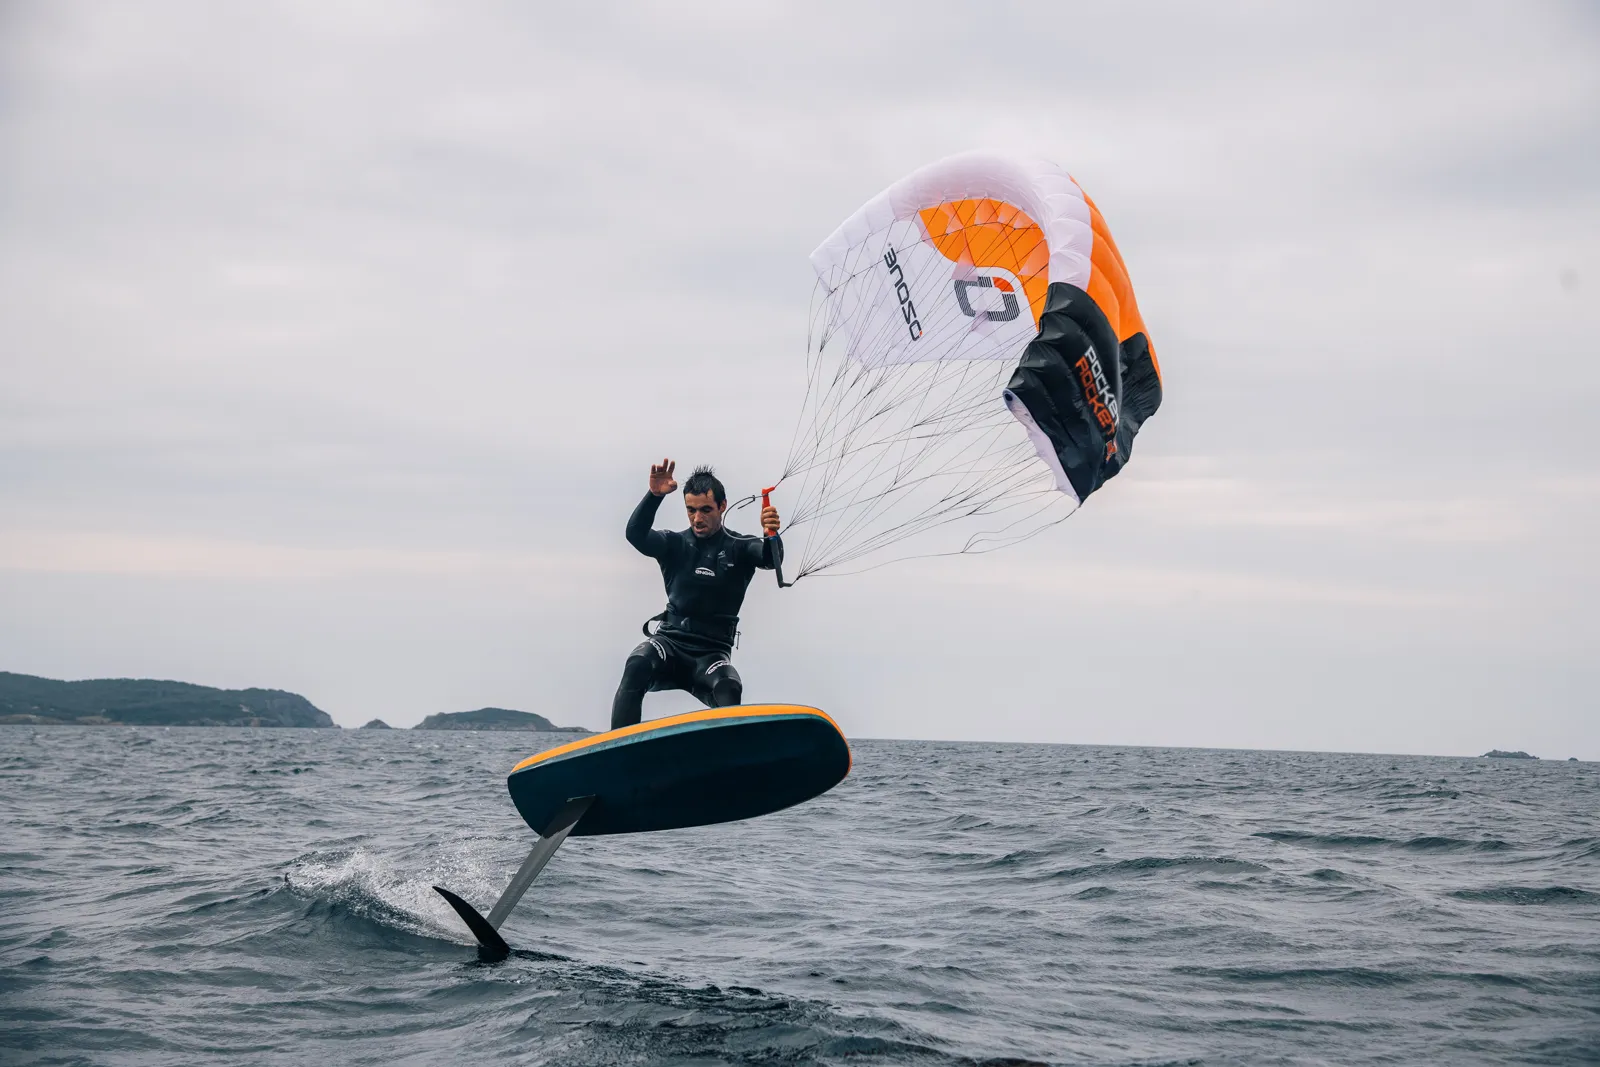
Some wings relaunch from the water more easily than others. Ozone’s Pocket Rocket is widely praised for reliable water relaunch. BRM’s single-skin models can require a bit more technique. Check your specific wing’s manual for any brand-specific relaunch tips.
Relaunch tips
Keep the lines clear. If lines are wrapped around the bar or tangled in the canopy, sort them before attempting relaunch. Pulling on tangled lines won’t inflate the wing properly.
Use the wind, not force. Yanking the bar rarely helps. Position the wing so the wind can get under the leading edge, and let the airflow do the inflation.
Practice in calm conditions first. Your first few relaunches are best attempted in moderate, steady wind. Gusty or very light wind makes relaunching harder.
Safety and Self-Rescue
Before every session
- Check all lines for wear, knots, or damage.
- Confirm your safety release works. Know how to activate it without looking.
- Tell someone where you’re going and when you expect to be back.
- Check the wind forecast and tide times. Avoid sessions in offshore wind unless you have boat support or a group.
If something goes wrong
Wing collapses or stalls: Most collapses recover on their own as the wing reinflates. If the wing spirals, release the bar to neutral (hands off or bar pushed away). This removes your steering input and lets the wing stabilise. If it doesn’t recover, activate your safety release and stow the collapsed wing.
Lines tangle mid-session: Land in the water, come off foil, and sort the lines while floating. Don’t try to untangle lines while riding. The short line lengths on parawings mean tangles are usually quick to resolve.
Losing power or wind drops: If the wind drops and you can’t sustain foil flight, you’re a foiler on a board. Prone paddle, sit and wait, or paddle to shore. The wing adds almost no weight or drag when stowed.
Equipment failure: If a line breaks or the bar malfunctions, stow the wing immediately by pulling everything toward you and bundling it. Paddle to shore.
Self-rescue
Your self-rescue in parawingfoiling is simpler than in kiteboarding because the wing is small, light, and can be completely stowed at any time. You’re never attached to a large, powered kite that’s pulling you.
If you need to get back to shore under your own power:
- Stow the wing completely.
- Paddle your foil board to shore. If conditions allow, prone foil using swell or small waves.
- If you can’t paddle back, float on your board and signal for help. Your board provides flotation. A whistle and a phone in a waterproof pouch are good habits.
Right of way and etiquette
Parawingfoiling is new, and other water users may not understand your setup or expect your line of travel. Give plenty of space to swimmers, surfers, wingfoilers, and kiters. Avoid launching or landing near other people. When in doubt, yield.
Your lines are short and your wing is small, but they’re still overhead hazards to anyone nearby. Be aware of your surroundings at all times.
Quick Reference: Common Mistakes
| Mistake | What happens | Fix |
|---|---|---|
| Not checking lines before launch | Wing spirals or fails to inflate | Walk the lines every single time |
| Pulling the bar too hard on launch | Wing stalls before fully inflating | Keep the bar neutral, let wind do the work |
| Fighting the harness | Arms tire quickly, poor body position | Let the harness carry the load, hands steer only |
| Trying to go upwind too early | Frustration, frequent crashes | Master straight-line foiling first |
| Stowing too fast | Tangled lines, messy bundle | Slow down, collapse the wing cleanly |
| Relaunching with tangled lines | Wing won’t inflate properly | Sort lines first, then relaunch |
| Ignoring wind changes | Overpowered or underpowered mid-session | Check conditions before and during sessions |
What to Expect: Your First Five Sessions
Session 1: Focus on beach launch, flying the wing overhead, and walking to the water. Get on your board and try a few straight-line foiling runs. Expect some crashes and relaunches.
Session 2: Your launches will be smoother. You’ll start to feel the rhythm of the wing’s pull and how it interacts with your foil. Try riding for longer stretches.
Session 3: Start working on turns and mild upwind angles. Practice stowing and relaunching intentionally, not just when things go wrong.
Session 4: Upwind riding becomes more natural. You’ll start linking upwind and downwind legs for full loops.
Session 5: Stow/relaunch becomes second nature. You’re foiling with the wing as a tool rather than thinking about it as a separate task.
This timeline assumes you’re already a competent foiler. If your foil skills are still developing, add more sessions for the foiling fundamentals before layering in the parawing.
Frequently Asked Questions
Do I need lessons for parawingfoiling?
There are very few formal parawingfoiling lessons available at this stage. If you already foil and have experience with kite or paraglider equipment, you can learn from guides like this one, YouTube footage, and community advice. If you’re completely new to both foiling and powered flight, consider taking a few kiteboarding or foiling lessons first to build the foundation.
What size parawing should I start with?
See our parawing size guide for detailed sizing by weight and wind. As a general rule, start with a mid-range size for your weight (5m or 6m for most riders between 70 and 90kg) and moderate wind conditions (12 to 18 knots).
Can I use my existing wingfoil board?
Yes. Most wingfoil boards work fine for parawingfoiling. A mid-length (5’ to 6’) board with a foil track is ideal. Smaller boards work too if you’re confident with your water starts.
Is parawingfoiling safe?
The risks are comparable to other foiling disciplines. The main hazards are the foil (sharp), the lines (can tangle), and the usual water sport risks (wind, current, cold). Parawingfoiling has some safety advantages: the wing is small and light, can be stowed instantly, and the short lines mean you’re never far from a large powered kite. Proper gear checks, knowing your safety release, and choosing appropriate conditions reduce risk significantly.
What’s the minimum wind for parawingfoiling?
Most riders can get on foil in 10 to 12 knots with the right wing size. Lighter riders on efficient foils can manage even less. This is significantly lower than wingfoiling, which typically needs 15+ knots.
Next Steps
Once you’re comfortable with the basics, explore these guides to refine your setup:
- Best parawings: compare every wing on the market
- Parawing size guide: dial in your sizing
- Best foil boards: find the right board for parawingfoiling
- Where to buy gear: retailers by region
- Harness and spreader bar guide: choosing and setting up your harness
- Safety and self-rescue guide: what to do when things go wrong
- Setup and rigging guide: detailed rigging steps with brand-specific tips
- Light wind parawingfoiling: equipment and technique for marginal conditions
- Beginner mistakes to avoid: the 8 most common errors and how to fix them
- Best parawingfoiling spots in the UK: where to ride